Appearance inspection
Appearance inspection, at the heart of manufacturing quality, involves the detailed examination of manufactured products to detect any surface defects that might compromise their quality or aesthetics. Manufacturers who succeed in meeting these challenges can benefit from improved product quality, greater customer satisfaction and market competitiveness.
In this crucial area, machine vision technology plays an essential role, enabling fast, accurate and detailed inspection of manufactured objects, as well as full traceability of inspection results.

The challenges of surface defects detection
Detecting surface defects in industry represents a crucial challenge for manufacturers, as it is closely linked to perceived product quality, customer satisfaction and, ultimately, brand reputation. Some products simply have to meet consumers’ aesthetic expectations. Any visual defect can damage the perception of a product’s quality and reliability, even if it doesn’t affect its functionality. Detecting appearance defects is therefore essential to maintaining a positive brand image. Appearance defects can lead to significant costs for manufacturers, including product replacements, returns, refunds, as well as loss of customers and therefore revenue.
In a fast-paced production environment, defect detection systems must be capable of inspecting products at high speeds, while maintaining excellent levels of accuracy and reliability. To detect defects at the earliest possible stage and thus gain in efficiency, detection systems may need to be integrated into existing production lines, without compromising productivity. This may also require automation of these systems.
Finally, certain appearance defects, such as tiny scratches or subtle color variations, can be extremely difficult for an operator to detect, yet have a significant functional or aesthetic impact. Aspect control therefore benefits from fast, automated, integrable, precise and reliable technologies such as industrial machine vision.
Appearance inspection by industrial machine vision
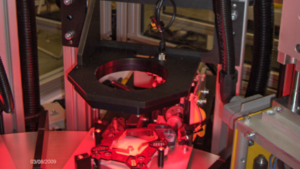
Industrial machine vision relies on optical systems and sophisticated software to analyze high-resolution images captured by specially designed cameras. These cameras are strategically positioned to provide a detailed view of each part or component to be inspected.
One of the major advantages of machine vision in appearance inspection lies in its ability to detect a wide range of defects, whether aesthetic, structural or functional in nature. Appearance defects include imperfections such as scratches, dents, cracks, bumps, variations in color or texture.

Automation and software for appearance defect detection
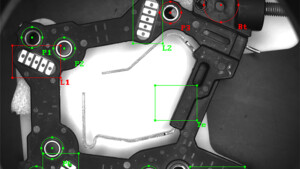
Advanced image processing algorithms enable machine vision to distinguish between defects and acceptable features with great accuracy, even in complex and variable production environments. These algorithms can be programmed to detect specific defects according to predefined criteria, guaranteeing consistent, reliable inspection.
Integrating industrial machine vision into production lines enables real-time inspection, reducing downtime and quality control costs. Vision systems can be configured to automatically reject faulty parts, ensuring that only compliant parts reach subsequent stages of the manufacturing process.
In addition to its role in detecting defects, machine vision also offers advantages in terms of traceability and documentation. Captured images can be recorded and archived for future reference, providing a complete trace of product quality at every stage of production.

In addition to its role in detecting defects, machine vision also offers advantages in terms of traceability and documentation. Captured images can be recorded and archived for future reference, providing a complete trace of product quality at every stage of production.
ASSOCIATED SETSMART TECHNOLOGIES
Visit the technology pages for more information on the control techniques used
