Looking for internal defects
Some products manufactured by assembling parts cannot be inspected without first dismantling them. At best, this makes it impossible to identify the defect in question, and at worst, it can lead to the destruction of the products. Non-destructive testing methods enable examination inside the assembly without dismantling.

Why looking for internal defect?
In many industrial sectors, such as aerospace, automotive, medical devices, electronics and even some consumer goods, assemblies are becoming increasingly complex and sophisticated.
These assemblies often include numerous mechanical, electrical or electronic components. They need to be correctly mounted or connected to each other, sometimes involving delicate soldering and difficult-to-access internal structures.
For instance, an inefficient connection, a missing screw or a soldering defect can lead to malfunctions or a reduction in the assembly’s lifespan.
In this context, quality control – a critical step in guaranteeing the reliability and performance of end products – is rendered highly complex. Control by dismantling, inspecting and then reassembling is not an option, since the operation is likely to generate the very defects the controller is looking to avoid.
Industries facing this type of situation are therefore looking for solutions to test their end products without first having to dismantle them.
A focus on non-destructive inspection using industrial radiography
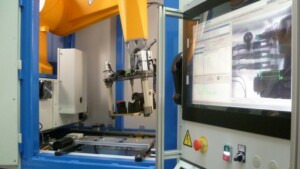
Industrial radiography offers a valuable solution for assessing the quality of these complex assemblies. Using advanced X-ray techniques, engineers can examine welds, joints, structure and internal components in detail, without damaging them or causing assembly faults that need to be avoided.
This not only identifies the defects mentioned above (ineffective connection, missing element, weld defect), but also detects the presence of foreign bodies, cracks, inclusions, porosities, material overlap or structural discontinuities that could compromise the integrity of the assembly.

In addition, analysis of industrial X-ray images can be used to check the internal dimensions of critical parts, providing a precise assessment of compliance with required specifications and tolerances.
Industrial radiography is used, for example, to detect the internal presence of mechanical or electronic parts in home automation systems. It can identify the presence, position and correct insertion of internal components such as connectors, screws and snap rings, ensuring optimal system operation.
Industrial radiography has valuable applications in the watchmaking industry, where precision and quality are essential to the manufacture of high-quality watches. It enables meticulous inspection of internal watch components, such as movements, springs and gears, to detect positioning faults or structural imperfections that could compromise watch performance and durability.
There are, of course, many other non-destructive testing technologies, such as ultrasound or eddy current, but they are mainly applicable to material health checks, and industrial radiography is the only one to provide such a wide range of inspection points.
ASSOCIATED SETSMART TECHNOLOGIES
Visit the technology pages for more information on the control techniques used
